Your image is too small for printing — here's what to do
An image too small to print typically requires resizing to at least 300 DPI or dimensions such as 3300x4200 pixels for quality output on platforms like Etsy and Printify. To fix a low res image, use methods like vector tracing, AI upscaling, or sourcing higher resolution files to avoid pixelation and maintain print clarity.

"Image too small for printing" is the most common print-prep problem for Etsy sellers, photographers, and digital download buyers. The fix depends on three things: how much smaller your image is, what the print is for, and how much quality you can compromise. There are five practical paths — AI upscaling, target size reduction, DPI compromise, source replacement, or order decline.
Most files fall short by 2-4× on the long edge. AI upscaling handles this range cleanly. Files that fall short by 8× or more usually need a different source image entirely — even AI can't invent that much detail without artifacts.
First: how short is your image, exactly?
Before fixing, measure the gap. Three pieces of information give you the full picture:
- What you have: the source image's pixel dimensions (e.g., 2,000 × 1,500 = 3 MP).
- What you need: the target print size in pixels at 300 DPI (e.g., 24x36 inches at 300 DPI = 7,200 × 10,800).
- The shortfall ratio: divide what you need by what you have on the long edge. (10,800 / 2,000 = 5.4× short).
A 1-2× shortfall is easily fixable with AI upscaling and you'll get sharp results. A 3-4× shortfall is the upper end of clean AI upscaling. A 5-8× shortfall is doable but with visible artifacts. Past 8× you should use a different source image. Use the megapixel calculator to compute your shortfall in seconds.
Related guides: fix low-resolution images for print, convert an image to 300 DPI, best DPI for Etsy, DPI checker.
Related guides: fix low-resolution images for print, convert an image to 300 DPI, best DPI for Etsy, DPI checker.
The five fixes (in order of common use)
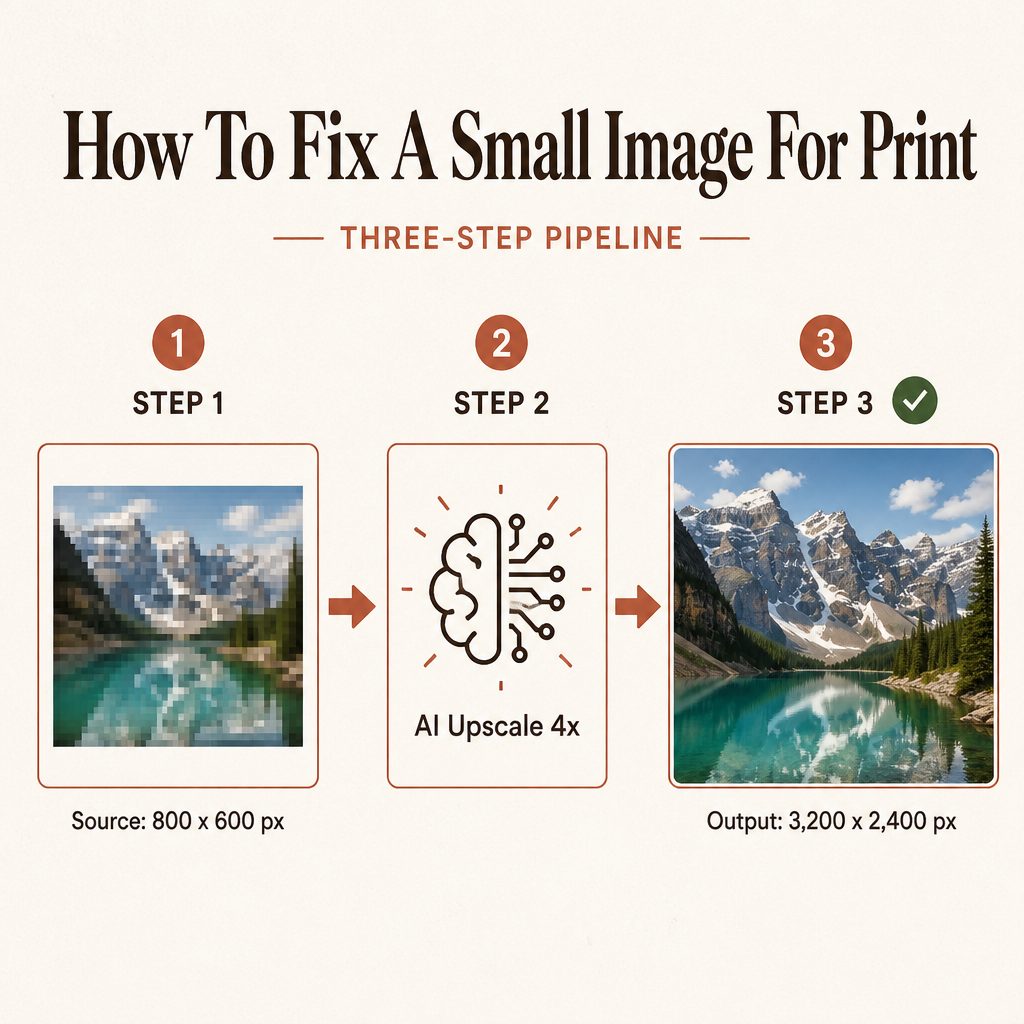
- AI upscale to fill the gap. The most common solution for shortfalls of 1-4×. AI upscalers add genuine new pixels with realistic detail (not blurry interpolation). Costs less than $0.05 per image and runs in 30-60 seconds.
- Reduce the target print size. If you wanted 24x36 but your image only supports 16x20 sharp, list as 16x20 instead. Easy, free, and the print quality stays at 300 DPI — the customer just gets a smaller print.
- Accept a lower DPI compromise. 200 DPI is acceptable for prints viewed from across a room (large posters, wall art above sofas). You can print 24x36 from a smaller source at 200 DPI — the eye can't easily distinguish 200 from 300 at typical viewing distance.
- Replace the source. If the shortfall is huge (5×+), find a different source. Stock photo (paid or free), re-shoot at higher resolution, or use a different design. Better to ship the right file than to AI-upscale beyond what produces clean results.
- Decline the order or refund. When none of the above work and the buyer's expectations can't be met. Better to refund a $5 order than ship a soft 24x36 and earn a one-star review that costs you future sales.
AI upscaling explained — what it does and doesn't do
AI upscaling uses machine learning models trained on millions of images to "guess" what high-resolution detail should look like in places where the source image only has low-resolution data. The best AI upscalers produce genuinely sharp output that's nearly indistinguishable from native high-resolution capture.
What AI upscaling does well:
- 2× and 4× upscales of photographic content (landscapes, portraits, still life)
- Botanical illustrations, abstract art, geometric patterns
- Single-subject images with clear focal points
- Source images with minor compression artifacts
What AI upscaling struggles with:
- Text content (especially small fonts — the AI may "invent" wrong characters)
- Faces with critical detail (the AI may shift facial features in subtle, sometimes unflattering ways)
- Source images with severe noise, blur, or compression artifacts
- 8×+ upscales (artifacts become visible)
- Heavy line art with very thin strokes
For Etsy wall art — mostly photographic, illustrated, or design content — AI upscaling at 2-4× produces results indistinguishable from native captures at typical viewing distance. This is the right tool for most "image too small" situations.
The fix workflow at a glance
Which fix applies to your specific situation
- "My phone photo isn't big enough for a 24x36 print." AI upscale 2-4× (works well for photographic content). A 12 MP phone photo upscaled 4× becomes 48 MP — close to the 78 MP needed and visually indistinguishable from native at typical viewing distance.
- "My Midjourney/AI-generated image is 1024 pixels." AI upscale 4× or 8×. AI-generated content typically responds well to AI upscaling because the source already comes from generative models. Plan for the 4× ceiling for clean results; 8× works for distance viewing.
- "A buyer wants a custom commission size that needs more pixels than my source." Either AI upscale (if shortfall is ≤4×) or decline the size and offer a smaller alternative. Don't promise sizes you can't deliver sharp.
- "My old scan or family photo is too small." AI upscale 2-4× usually works. Older photos benefit particularly because AI can fill in detail lost to scanning artifacts. 8×+ tends to invent details that don't match the original photo's character — not always desirable for personal photos.
- "My stock photo is the wrong size for my print." Either AI upscale (if shortfall is small) or buy a higher-resolution version. Most stock photo sites offer multiple resolutions; check whether a larger version is available before upscaling.
Mistakes to avoid when fixing a too-small image
1. Just changing the DPI metadata to 300 without adding pixels
Stamping 300 DPI on a 1,000-pixel image makes it print at 3 inches sharp, not at 8 inches sharp. DPI metadata doesn't add pixels — it changes how the printer interprets the pixels you have. To genuinely fix a too-small image, you need more actual pixels (AI upscaling), not different metadata.
2. Using Photoshop's "Bicubic Smoother" instead of AI upscaling
Photoshop's interpolation produces visibly soft, mushy enlargements. AI upscalers produce genuinely sharp output. The cost difference is small ($0.01-0.05 per image vs free in Photoshop) but the quality difference is enormous. Always AI upscale, never bicubic.
3. Trying to AI upscale 10× or more
Even the best AI upscalers start to invent unnatural details past 8× upscaling. A 1 MP source upscaled 16× produces images that look impressive at thumbnail size but reveal AI artifacts at print size. Cap your upscale at 4-8× depending on content type.
4. Promising a print size you can't deliver sharp
If your source can only support 16x20 sharp, don't list 24x36 as an option. Buyers expect 300 DPI for the size you advertise; delivering soft prints generates refund requests and bad reviews. Either upscale to genuinely support the size or list at the size your source supports.
5. Skipping the diagnostic step
"Just AI upscale it" without first measuring the shortfall leads to over-upscaling (wasted compute, lower quality) or under-upscaling (still too small after the upscale). Always check the gap first using the megapixel calculator — takes 30 seconds, saves rework.
Frequently asked questions
Fix any too-small image automatically
Ratio Ready upscales, crops, and DPI-stamps in one upload. 75 Creative Credits free on signup.